
In today’s world, remote work has become an indispensable part of many people’s lives. While this shift towards digital workspace has brought about flexibility and convenience, it has also opened a Pandora’s box of potential security threats. A secure network is crucial to protect sensitive information and ensure seamless remote work operations. One powerful tool that can help safeguard your work-at-home network is AlienVault OSSIM.
AlienVault OSSIM (Open-Source Security Information and Event Management) is a comprehensive, feature-rich security platform designed to consolidate numerous security functions into one place. Although primarily used by businesses, it can be an effective tool for securing home networks as well.
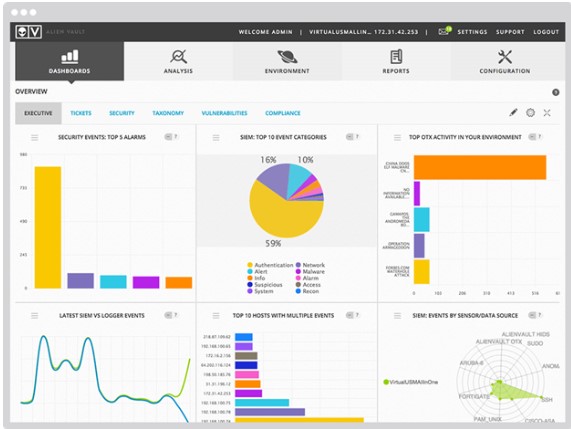
Figure 1: The AlienVault OSSIM Dashboard
This blog will guide you through a step-by-step process of securing your work-from-home network using AlienVault OSSUM.
Step 1: Install AlienVault OSSIM
- Download the latest AlienVault OSSIM version from the official website.
- Write the downloaded image to a DVD or a bootable USB drive.
- Insert the DVD or USB into your system and reboot to initiate the installer.
- Follow the on-screen instructions to complete the installation.
Step 2: Setting Up AlienVault OSSIM
- After installation, it’s time to set up AlienVault OSSIM. The default login credentials are ‘admin’ for both username and password.
- Log into the AlienVault Console and immediately change the default password to something strong and unique.
- Configure your system’s network settings, including the IP address, netmask, gateway, DNS, and hostname.
Step 3: Configure Sensors
- Sensors are key to AlienVault OSSIM’s functionality. They collect data about network activities, which OSSIM uses to monitor your network.
- Navigate to Configuration > Deployment > Sensors in the AlienVault Consol.
- Click ‘Add Sensor’ and fill in the required details, including sensor name, IP address, and VPN IP address.
- Follow the on-screen instructions to complete the sensor setup.
Step 4: Set Up Network Monitoring
- To set up network monitoring, you’ll need to define what activities OSSIM should monitor.
- Go to Environment > Detection > Directives in the AlienVault Console.
- Here, choose from pre-configured rules or create your own rules based on your specific need.
Step 5: Configure Incident Response
- Upon detecting a potential security incident, OSSIM can respond in various ways depending on your settings.
- Navigate to Configuration > Threat Intelligence > Responses in the AlienVault Console.
- Configure the actions that should be taken in response to different types of incidents. You can opt for pre-configured responses or customize your own.
Step 6: Configure Sensors
- Securing your network doesn’t end after the initial setup. Regular reviews and updates are crucial.
- Frequently check the AlienVault Console for alerts or notifications.
- Regularly review OSSIM-generated logs and reports to identify potential issues.
- Update your rules, sensors, and responses based on your findings to maintain robust security.
Securing a work-at-home network may seem like a daunting task, especially with sophisticated tools like AlienVault OSSIM. However, once you get the hang of it, the process becomes second nature, ensuring your peace of mind as you navigate the realm of remote work. Remember, network security is an ongoing process that requires vigilance, constant updates, and maintenance. AlienVault OSSIM is a powerful ally in this battle, offering an all-in-one platform for network security management. Happy secure remote working!